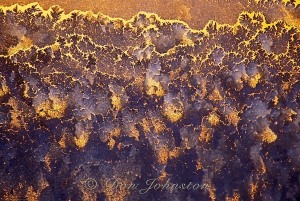
Backyard animals 2021

Happy New Year readers. Here is a selection of backyard wildlife images I made during 2021. Please enjoy! 

Ruffed grouse (Bonassa umbellus) Male grouse in courtship display, Greater Sudbury, Ontario, Canada
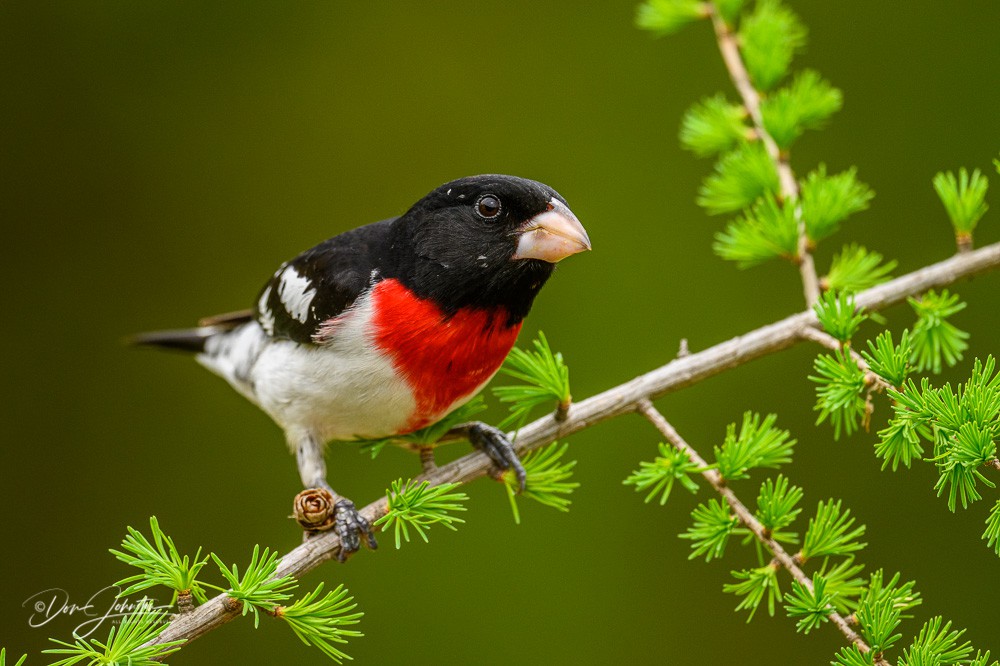
Rose-breasted grosbeak (Pheucticus ludovicianus). Male, Greater Sudbury, Ontario, Canada
American goldfinch (Carduelis tristis). Male, Greater Sudbury, Ontario, Canada
Purple finch (Carpodacus purpureus). Male, Greater Sudbury, Ontario, Canada

Now, we do have a big ‘backyard’, in a rural setting, but this type of photography can be managed virtually everywhere. Some tips for success include:

Make habitat available such trees, flower gardens and wildflowers.

Goldenrod crab spider feeding on captured hummingbird moth in a flower garden, Greater Sudbury, Ontario, Canada
Ruby-throated hummingbird (Archilochus colubris) Foraging for nectar in garden flowers, Greater Sudbury, Ontario, Canada
Confused Haploa moth (Haploa confusa), Greater Sudbury, Ontario, Canada

Set up perches near a bird feeder for realistic backgrounds and surroundings.

Pine grosbeak (Pinicola enucleator). Male, Greater Sudbury, Ontario, Canada
Pine grosbeak (Pinicola enucleator). Female/immature, Greater Sudbury, Ontario, Canada
Evening grosbeak (Hesperiphona vespertina). Male, Greater Sudbury, Ontario, Canada
Downy woodpecker (Picoides pubescens). Male., Greater Sudbury, Ontario, Canada
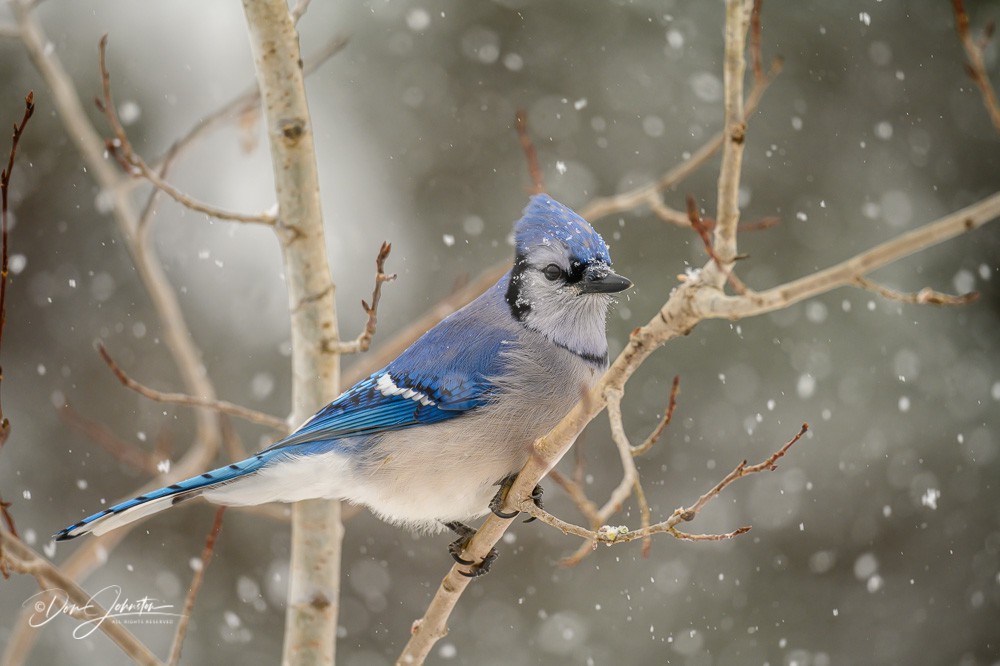
Blue jay (Cyanocitta cristata), Greater Sudbury, Ontario, Canada

Attract wildlife using responsible techniques and resources.

Rose-breasted grosbeak (Pheucticus ludovicianus). Male, Greater Sudbury, Ontario, Canada
Black capped chickadee (Poecile atricapillus), Greater Sudbury, Ontario, Canada

Be a good naturalist so you can recognize and react to promising situations.

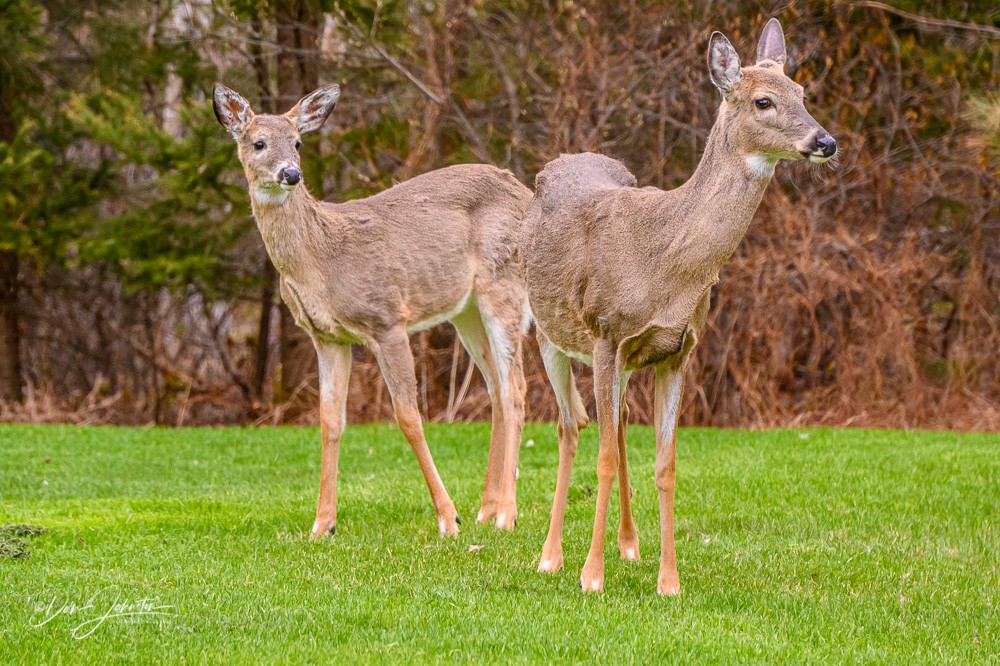
White-tailed deer (Odocoileus virginianus). Doe and yearling fawn visitng backyard lawn to feed on grass, Greater Sudbury, Ontario, Canada
White-tailed deer (Odocoileus virginianus). Buck in autumn rut, Greater Sudbury, Ontario, Canada
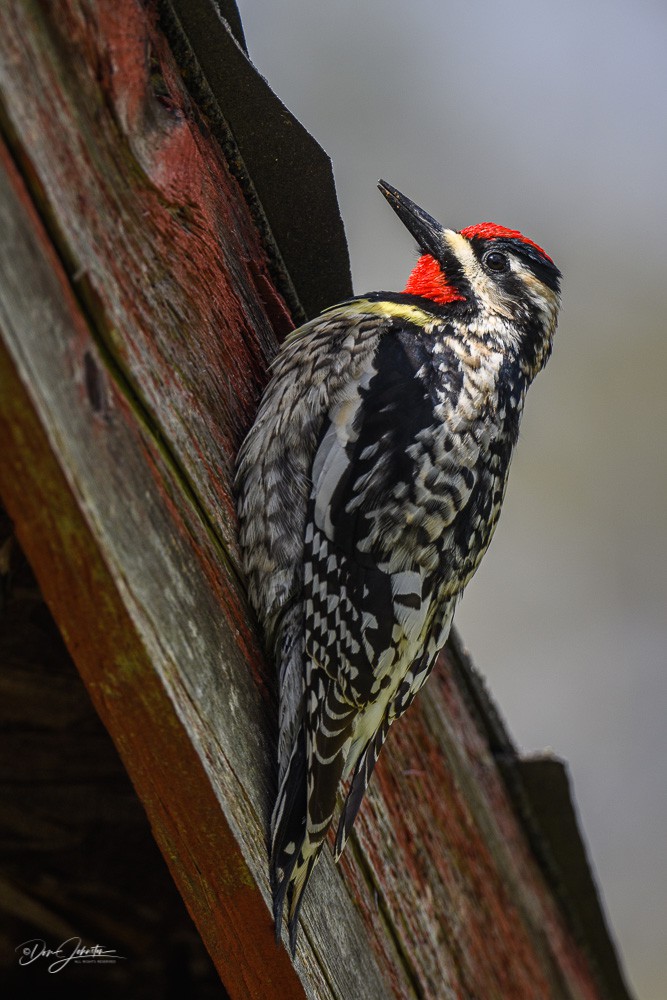
Yellow-bellied sapsucker (Sphyrapicus varius) Male drumming on shed, Greater Sudbury, Ontario, Canada
Milksnake (Lampropeltis triangulum), Greater Sudbury, Ontario, Canada

Have your camera with an appropriate lens ready so you can react to and capture fleeting moments.

Ruby-throated hummingbird (Archilochus colubris) Perching on a Metalbird sculpture, Greater Sudbury, Ontario, Canada
Red squirrel (Tamiasciurus hudsonicus) Resourceful individual raidng bird feeder hanging from clothesline, Greater Sudbury, Ontario, Canada

Set up a blind to photograph animals that are easily spooked so they can be observed without distracting them. 

Ruffed grouse (Bonasa umbellus) Male on drumming log in spring courtship ritual, Greater Sudbury, Ontario, Canada

We do not have pets- cat or dog or otherwise. While their companionship is valued, not having a pet puts wildlife at ease. Over the years we have been visited by a wide variety of animals, looking for food or just passing through.

Indoor creative winter photography

This series of photos all began with me slicing a pineapple for the morning fruit smoothie. A running joke in our kitchen centers around me noticing photographically attractive patterns such as in red onions or a bunch of pumpkin seeds. In this case it was the inner core of a pineapple stem.

Cut pineapple stem

I noticed the patterns in the cut stem of the pineapple and decided to photograph it with my macro lens, trying to accentuate the circular concentric patterns.

When finished I moved the camera and tripod to the living room. The camera happened to be facing the Christmas tree. I noticed the electronic viewfinder on my Z7, being still active, was showing me out of focus blue and white images of the Christmas tree lights that the lens happened to be pointing at. Aha! Another photo opportunity. I started making a few exposures of the out of focus lights, changing the focus to make them larger or smaller. I kept the aperture wide open so as to render the lights as circular images.

Christmas tree lights, out of focus, wide aperture
Christmas tree lights, alternate focus

Then I remembered the Z7 has the capability of combining images with a technique called Image Overlay. I proceeded to photograph some of the Christmas tree ornaments using normal focus and then I combined selected images with the out of focus tree lights using the Overlay method.

Tree lights and hanging Santa ornament

The composite image

This is the type of thing that can keep me as a photographer busy whilst indoors (a rainy winter day here today) so long as I am open to the visual possibilities existing around me. Being observant and willing to experiment led me to produce these indoor photos. While my primary interest is nature photography, I consider myself a photographer first.

Happy Holidays!

Creative springtime approaches

Greetings to all my new outlook followers. Welcome aboard!

Green starts to appear in Northern Ontario in early to mid-May, along with the blackflies! The first blush of green in the aspens is always a delight and I make sure to get out with the camera to some of my favourite locales.

Looking up in an aspen woodland. f22, 1/160 @ 35 mm

When the sun is bright and the skies are blue I resort to backlighting to take advantage of the translucent green glow in the emerging leaves. I prefer soft overcast with these first spring colours but I have to ‘go with the flow’ and make the best of what mother nature offers me.

Trying to be creative I usually drift toward some interpretive techniques, most of which are ‘in camera’. I hope to communicate the essence of spring with these approaches- delicacy, freshness, transience to name a few.

One technique I like is to look for emerging leaves in smaller trees near the camera. Positioning them between me and the lens I then (manually) focus on background subjects such as these birch tree trunks. With a telephoto lens and shallow depth of field I created this image (below), all in one shot, in the camera.

Birch woodland. In-camera selective focus. f/4 @ 86 mm

Another in-camera technique I like to occasionally use is multiple exposure. I choose six to ten frames and with a wide aperture I expose 5/6 or 9/10 with varying degrees of ‘de-focus’. I have to deselect autofocus and manually change focus, sometimes accompanied with a bit of zooming.

Aspens on a hillside. In-camera 6 frames. 240 mm.

Birch woodland. In-camera multiple exposure. 10 frames 155 mm f4 manual focus.

Birch woodland. In-camera multiple exposure. 10 frames 155 mm f4 manual focus.

Finally, with stands of tree trunks like these aspens I move the camera slowly up or down or up and down during a long exposure. I obtain longer exposure times using low ISO, small apertures and a polarizing or neutral density filter. This photo was made @200 mm and 3 seconds.

Aspen woodland. 3 seconds @ f20, ISO 31.

The advantage to employing these techniques is that the photographer can make interesting, unique images close to home.

Backyard Animals- Summer 2017

In the spirit of celebrating photography done close to home I offer a small selection of animal subjects photographed in and around our backyard this summer and early fall. Producing quality images from such close proximity to the house does depend on a number of factors, many of which can be controlled by the photographer.

Eastern chipmunk (Tamias striatus) Eating a wild blueberry. I placed a piece of old log on my deck rail and offered a few blueberries.

I always have my cameras ready and easily accessible when we notice a photo opportunity. Battery charged, memory card formatted, lens attached, tripod ready for action. These encounters are often fleeting.

Horned clubtail dragonfly (Arigomphus cornutus) Female preying on another dragonfly. After noticing the subject I grabbed my 200 micro on a tripod and approached slowly. I had about 10 minutes.

It’s important to provide habitat for local critters. Things like feeders (when bears are not around), butterfly gardens, trees and shrubs for cover are important. Also important is good local knowledge of animals and their habits. Having a solid naturalist background gives the nature/wildlife photographer an advantage.

Red squirrel (Tamiasciurus hudsonicus) Foraging in spring maple tree

Large milkweed bug (Oncopeltus fasciatus) Mating pair on a milkweed leaf. The milkweed patch is a hive of ecological activity.

I sometimes create natural perches or settings for animals like chipmunks and frogs. Some natural treats like blueberries help coax them to the preferred spot.

Wood frog (Lithobates sylvaticus or Rana sylvatica). Sitting in some dried leaves I collected.

Most important is having great spotters like my wife Brenda. She noticed the sharp-shinned hawk flying into the tree with its prey. My son Matthew spotted the very well camouflaged wood frog near our garden.

Sharp-shinned hawk (Accipiter striatus) Eating a songbird it had captured.

And of course, luck plays an important role. While I was waiting for the chipmunk to climb up to the log for some blueberries I noticed a deer fawn approaching the back yard from the bush behind. It stayed out on our lawn, eating some grass and bouncing around for a good half hour before it wandered off.

White-tailed deer (Odocoileus virginianus). Curious fawn visiting our rural backyard.

While trying to photograph chickadees eating pine seeds (again spotted by Brenda!) I noticed a pair of ruffed grouse eyeing each other in the margins of our driveway. They worked their way down towards me, oblivious to my presence.

Black capped chickadee (Poecile atricapillus) Foraging for seeds in red pine tree cones

Red squirrel (Tamiasciurus hudsonicus) Foraging for pine cones in a red pine

Ruffed grouse (Bonasa umbellus) Two individuals confronting one another in early autumn.

Bad Light- There is no such thing

Jay Maisel, in his book Light, Gesture and Color, presents many compelling images made in ‘Bad Light’. Mr. Maisel’s contention is that there is no bad light in photography, only vision and opportunity.

Nature and landscape photographers usually do not care for high, hard, midday light although there are always backlighting opportunities and blue skies. This is especially true in the forest where the combination of trees and light present huge ranges in tonal contrast, that at times overwhelms the sophisticated modern DSLR sensor.

Autumn foliage on Vancouver Island, Sooke, BC- straight shot

Such was the case for this picture (above). While touring on  Vancouver Island I stopped for the backlit red and green foliage and used a polarizer to try and tone down some of the highlights glinting off the leaves. In post processing I was able to tone down highlights and reveal some detail in the shadows but the straight image is still very contrasty and pedestrian.

Thinking ahead I decided to make duplicate images partially and completely out of focus. I thought I could combine each one later with the ‘straight shot’. This is a digital version of the Orton effect, pioneered in the slide film days by Vancouver Island photographer Michael Orton.

Autumn foliage on Vancouver Island, Sooke, BC- Combination-1

Autumn foliage on Vancouver Island, Sooke, BC- defocused-1

This can be done in camera too, certainly with Nikon DSLRs, but the drag and drop approach for two images is very easy to accomplish in Photoshop. Once combined, I adjusted the opacity slider in the layers window to reveal about 50% of the focused image. I think the results are keepers! What do you think?

Autumn foliage on Vancouver Island, Sooke, BC- Combination-2

Autumn foliage on Vancouver Island, Sooke, BC- defocused-2

Street Photography with a Tripod

I’m a bit out of my element in an urban environment but as generalist photographer I do not shy away from such settings if I have the opportunity. Such was the case when I joined two friends for a street photography workshop in Central Havana with Dan Callis.

Malecón (officially Avenida de Maceo) Seawall with fishermen silhouetted against the Vedado neighbourhood. 1/15@f20

Malecón (officially Avenida de Maceo) Seawall with fishermen silhouetted against the Vedado neighbourhood. 1/15@f20

Street photogrphy in central Havana- Calle Escobar with dawn streetlights

Street photography in Central Havana- Calle Escobar with dawn streetlights. ½ s@f5 ISO 1600

Iglesia San Francisco de Paul - Stained glass interior

Iglesia San Francisco de Paul – Stained glass interior 1/30@f16 ISO 200

Street photogrphy in central Havana-

As morning progressed, doors opened to building interiors. 1 s@f16 ISO 400.

I was the only one in the group who used a tripod for the majority of the work that week but I thought I was able to acquire unique images that would not be easy or possible if I was handholding the camera. Certainly with image stabilization and better quality at higher ISOs handholding has become more the norm.

Street photogrphy in Old Havana- reflections in a water puddle

Street photography in Old Havana- reflections in a water puddle. 1/80@f18 ISO 400

Street photogrphy in central Havana- Painted wall detail

Painted wall detail 1/4s@f16 ISO 125

While having the camera mounted to my tripod (Gitzo carbon fiber) added some weight, reduced mobility when working a subject and made me more conspicuous in the street I still felt it was the right approach for me. I carried accessories and lenses in my trusty photo vest and felt pretty comfortable for the week in the streets of Havana. It was a fantastic experience, full of colour, atmosphere and friendly people.

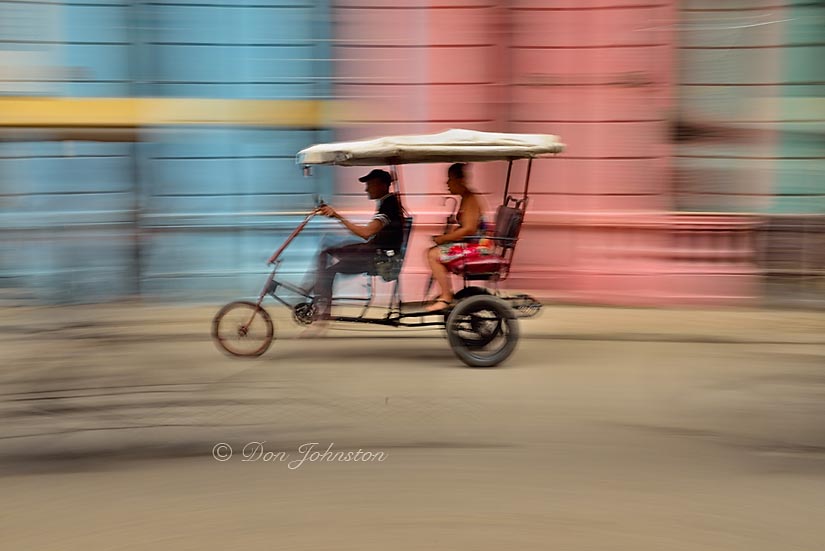
Bicycle taxi and colourful building, panning with camera. ½ s@f16 ISO 100

Bicycle taxi and colourful building, panning with camera. ½ s@f16 ISO 100

Here are some of the advantages to using a tripod in the streets:

  1. Once I picked my spot for composition I could ‘fade into’ the background and wait for situations to develop. That could be as simple as waiting for someone to walk into the composition or wait for distracting elements like people or vehicles to move on. While I was initially conspicuous the local people quickly ignored my presence and I could photograph the scene using a cable release so I would remain inconspicuous.
  2. By precisely framing the composition I could make more than one exposure as people moved if I thought it would be better to be able to clone them out in a composite image.
  3. I was able to work at lower ISOs and at longer exposures, in the shadows, in interiors, at night and early morning.
  4. I could set up my composition and wait for peak moments of activity.

A lady peeking through a curtain and security fence. 0.6 s@f11 ISO 800

A lady peeking through a curtain and security fence. 0.6 s@f11 ISO 800

Trained dog on the Obispo promenade with passersby. 1.6 s@f22 ISO 100.

Trained dog on the Obispo promenade with passersby. 1.6 s@f22 ISO 100.

I waited for passersby with umbrellas to walk through this scene. 1/10 s@f16 ISO 800

I waited for passersby with umbrellas to walk through this scene. 1/10 s@f16 ISO 800

Revolutionary wall art with blurred pedestrian. 1/13 s@f18 ISO 640

Revolutionary wall art with blurred pedestrian. 1/13 s@f18 ISO 640

Wall mural on Calle Neptuno with pedestrians cloned out (composite of 3 exposures)

Wall mural on Calle Neptuno with pedestrians cloned out (composite of 2 exposures)

Maybe I missed some spontaneous shots but I think I got photos that fit my style that otherwise would not have been able to capture hand-held. The tripod is not just a useful tool for obtaining sharp images, it is also a useful compositional tool.

Straight Shots

Marsh marigold (Caltha palustris) growing at the edge of small river, with sunlit highlights from the river water.

Marsh marigold (Caltha palustris) growing at the edge of small river, with sunlit highlights from the river water.

I love making abstract, interpretive, impressionistic images with my camera. It’s satisfying to be able to create these types of  images, straight out of the camera. They are less documentary and in some cases inspire ‘what is it?’ comments. These images emphasize colour, texture, shape and line. They convey feelings of delicacy, fragility, lightness and euphoria or spirituality. It is possible to achieve these types of images without the use of image altering computer software. All it takes is careful observation and imagination along with a good knowledge of how the camera captures images.

Here are some recent images that illustrate some techniques I like to employ. I include some tips and advice to help you produce your own interpretive images, straight from your camera.

  1. Shallow depth of field- I begin by setting the lens to f4 or so (wider aperture) with the intention of selectively focusing on my subject. I scout the composition  while handholding the camera to give freedom of movement and then when I find the angle and focus point I desire I mount the camera back on a tripod for a more careful composition. This is often called ‘selective focus’ because something will be in focus while much of the subject will be rendered as out of focus colourful blobs.

Birch trees in spring. Selective focus. f 5.6 210 mm

Birch trees in spring. Selective focus. f 5.6 210 mm

One subject I tried this spring was a birch woodland with emerging (backlit) leaves in birch saplings nearer the camera. I was fortunate to finally notice an excellent example below me as I stood on a hillside rock outcrop. My original intention was to climb the hill and photograph emerging foliage in distant trees on a hillside. I still photographed that hillside but I spent most of my time on the hill photographing the birch tree trunks and fresh new leaves.

Birch trees in spring. Selective focus. f 5.6 320 mm

Birch trees in spring. Selective focus. f 5.6 320 mm

This technique also works well for flowers especially with the camera set low to the ground and a focus point set on more distant blossoms. You can even try it with super telephoto lenses!

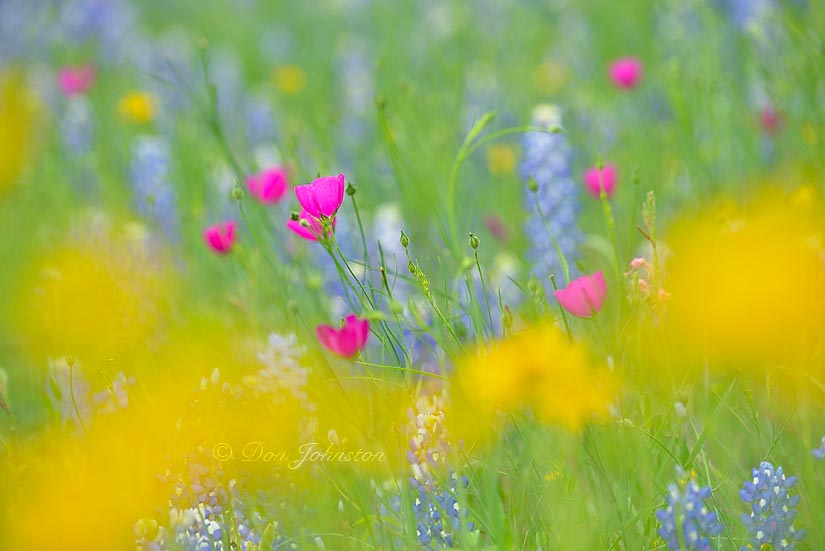
Texas wildflowers, telephoto lens, selective focus 300 mm @ f7.1

Texas wildflowers, telephoto lens, selective focus 300 mm @ f7.1

Texas wildflowers, 80-400 @ 280 mm f8.

Texas wildflowers, 80-400 @ 280 mm f8.

  1. Macro lens painting- This is a technique I tried after reading a posting from US photographer and photography educator Janice Sullivan. The technique employs long exposures (5 seconds or so), the camera hand-held on colourful subjects such as garden flowers. I started the exposure on a blossom and then pointed the camera at nearby colourful displays, all in the same exposure.

Macro lens painting in a flower garden. 5 seconds @ f18, 105 mm

Macro lens painting in a flower garden. 5 seconds @ f18, 105 mm

Macro lens painting in a flower garden. 5 seconds @ f18, 105 mm

Macro lens painting in a flower garden. 5 seconds @ f18, 105 mm

  1. Camera movement/panning- This is a tried and true technique for creating impressionistic images of subjects like woodlands. I use it extensively in spring and fall. For the images below I moved the camera up and down during a lengthy (5 second or so) exposure while I was photographing a pine woodland in fog. The vertical lines certainly suggest I should use a vertical composition but I often do this horizontally to include more Vertical lines- tree trunks. Telephotos work best but I have tried this technique with wide-angle lenses too with interesting perspective results.

Red pine woodland in morning fog- camera movement, 5 seconds, f20, 125 mm

Red pine woodland in morning fog- camera movement, 125 mm, 5 seconds @ f20


Red pine tree trunks in morning fog- camera movement, 3 seconds, f20, 34 mm

Red pine tree trunks in morning fog- camera movement, 34 mm, 3 seconds @ f20

  1. Natural distortions- I often like to photograph the reflective surfaces of lakes and ponds, in spring, summer and fall, concentrating on the gentle distortions of the reflected shoreline features created by the water. In the examples below however, I was stuck in my car, waiting out a thunderstorm. I left the wipers off and decided to photograph the distorted autumn woodland through the rain-soaked windshield. I hand-held and used my 105 mm macro. Focusing on either the subject or the windshield yielded different results and these can be evaluated immediately by reviewing images in the camera monitor. That’s the beauty of digital photography- being able to see the results in real time so adjustments or refinements can be made!
  2. White birch tree woodland in autumn colour at Lake Laurentian Conservation area as seen through a rain-soaked windshield. 105 mm lens f 3.5

    White birch tree woodland in autumn colour at Lake Laurentian Conservation area as seen through a rain-soaked windshield. 105 mm lens f 3.5


    White birch tree woodland in autumn colour at Lake Laurentian Conservation area as seen through a rain-soaked windshield. 105 mm lens f 3.5

    White birch tree woodland in autumn colour at Lake Laurentian Conservation area as seen through a rain-soaked windshield. 105 mm lens f 3.5


Rainy Day Photography- 2

In another life I taught High School Science. Biology was my specialty. One of the topics I presented was ‘water- it’s special properties’ something that all Biology students need to understand in order to study Biology at any level of Biology, be it biochemical or ecological.

Raindrops collect on the waxy surface of a fallen leaf

Raindrops collect on the waxy surface of a fallen leaf

Safe to say this was not the most exciting topic for biology students, especially at the start of the semester but I endeavoured to make it as interesting and applicable as possible using some simple but very cool demonstrations that always captured student interest and helped make them appreciate the topic.

Raindrops cling to a garden flower stem.

Raindrops cling to a garden flower stem.

Water molecules are peculiar and one can demonstrate their fascinating nature by observing the behaviour of water drops. I sprinkled some water on a sheet of wax paper placed on an overhead projector. With a toothpick I towed water drops around on the slippery surface and the students could watch them merge when they got close together- always retaining their round shapes. Terms like hydrophobic and hydrophilic could be introduced. In another demonstration (which needs low humidity btw!) I combed my hair to put an electrostatic charge on the comb and then used it to attract a thin stream of water from the faucet.

Interrupted fern (Osmunda claytoniana) fronds with raindrops

Interrupted fern (Osmunda claytoniana) fronds with raindrops

Canada blue joint, Calamagrostis canadensis. Raindrops on leaves

Canada blue joint, Calamagrostis canadensis. Raindrops bead up on the waxy leaves

Living things take advantage of these peculiar properties in many ways and it was then my task to try and make those connections over the course of the semester.

Yellowing garden iris leaves and raindrops in autumn

Yellowing garden iris leaves and raindrops in autumn

These days I am a photographer, but still fascinated by water drops clinging to stalks of grass, glistening on spider silk or beading up on the waxy surfaces of leaves. To photograph these phenomena I need a macro lens, tripod, calm conditions and preferably soft overcast light, but backlighting could work occasionally too. Shallow depths of field and careful framing are important factors to achieving success. Keywords such as ’round’, ‘fresh’, ‘delicate’, ‘reflections’, come to mind when photographing. I like soft backgrounds achieved by using shallow depths of field. Keeping the raindrops in focus requires careful camera position, parallel to the main plane of the drops or sometimes I use Helicon focus stacking techniques to merge different areas of sharpness.

Raindrops clinging to strands of hairgrass in late summer

Raindrops clinging to strands of hairgrass in late summer

Raindrops on grass spider web with red blueberry leaf

Raindrops on grass spider web with red blueberry leaf

Staghorn sumac (Rhus typhina) Autumn leaves with raindrops

Staghorn sumac (Rhus typhina) Autumn leaves with raindrops

After a light rain I hope for calm conditions and then venture out. Normally I do not need to go far.

Brenda and I will be away for over a month, exploring the Northwest Territories to Wood Buffalo NP and up to Yellowknife, with another tour in to Arctic Haven Lodge in Nunavut included. I won’t be blogging until after I return but until then good shooting!

Rainy Day Photography- 1 ‘no wipers please’

I began thinking about photographing in the rain as I was editing a batch of pictures from Nunavut. On the day in question our weather forecast was deadly accurate as a spectacular sunrise heralded the approaching system. It started gently allowing me to make images of raindrops on rock formations along the lakeshore but quickly morphed into a driving rainstorm that left our group lodge-bound for more than a day.

Ennadai Lake at dawn ''Red sky in the morning, sailor's warning'

Ennadai Lake at dawn ”Red sky in the morning, sailor’s warning’

Ennadai Lake shoreline rocks with first raindrops.

Ennadai Lake shoreline rocks with first raindrops.

Subarctic taiga as seen through rain-soaked window. ⅛ @ f16 ISO 1600

Subarctic taiga as seen through rain-soaked window. ⅛ @ f16 ISO 1600

Subarctic taiga as seen through rain-soaked window. ⅛ @ f16 ISO 1600

Subarctic taiga as seen through rain-soaked window. ⅛ @ f16 ISO 1600

Still, when it comes to photography I have a ‘glass half-full’ attitude and while the rain pelted down I decided to photograph the landscape through the lodge windows. There was plenty of room to set up a tripod in the lounge area. I used an aperture of f16, expecting the water on the window to blur the terrain in impressionistic ways and distort the scenes outside. As I thought about these images I realized that I had others, taken years ago at home and in Algonquin Park.

Algonquin's highway 60 seen through a rain-soaked window. 1/15 s @ f11 ISO 800

Algonquin’s highway 60 seen through a rain-soaked car window. 1/15 s @ f11 ISO 800

Autumn trees as seen through a rain-soaked window. ⅛ s @ f16 ISO 800

Autumn trees as seen through a rain-soaked car window. ⅛ s @ f16 ISO 800

A little rain has never stopped me from photographing scenes in nature. Most experienced outdoor photographers recognize that rainy conditions offer wonderful opportunities to make distinctive images, so long as they and their equipment are protected from the elements. A quick internet search will reveal a myriad number of gadgets designed to make photography doable in wet weather. But it can be as simple as a clear plastic bag with a couple of carefully placed holes for lens and eyepiece or a plastic shower cap from the motel room covering the camera body. I like to attach a polarizing filter to the lens when it rains as it is more easily wiped with paper towel if rain drops accumulate (watch for fibers if it gets wet). Your lens hood should protect against raindrops accumulating on the filter and the polarizer offers the added advantage of saturating colours and removing glare and reflections from wet surfaces. The recently released Flex Lens Shade can provide additional protection to the front element of your lens

Garden flowers through wet window. Not rain. Brenda was watering the garden outside this window. I stayed dry indoors.

Garden flowers through wet window. Not rain. Brenda was watering the garden outside this window. I stayed dry indoors

Today’s professional and semi professional camera bodies and lenses are well sealed against water and can stand a little rain without damage. I try and towel off my camera body under the hatch back of the car when necessary and I sometimes use the hatchback as a rain shield if I can photograph a scenic close to the car. If the rain is pelting down I look for interesting images through the windshield while I wait out the downpour. Of course the wipers have to be off and the camera will likely have to be hand-held so higher ISOs will be necessary.

Subarctic taiga as seen through rain-soaked window. ⅛ @ f16 ISO 1600

Subarctic taiga as seen through rain-soaked window. ⅛ @ f16 ISO 1600

In a follow-up post I will present some close-up images of raindrops on vegetation together with technical notes and the best conditions for capturing similar photos.

Friday the Thirteenth

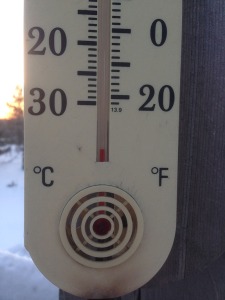
I suppose it is bad luck when the morning brings temperatures much lower than they should be for this time of the year. This morning I heard the news reader mention that the dreaded ‘Polar Vortex’ has returned. I took my iphone out on the deck this morning along with bird seed for some extremely fluffy chickadees, redpolls and pine grosbeaks. I stopped for a photo of our deck thermometer. It is the coldest morning of the year so far and January has come and gone.

The deck thermometer at sunrise 2015 02 13

The deck thermometer at sunrise 2015 02 13

But for me the photographic silver lining in this Friday the 13th cloud is the potential for some good window frost photos from the back window of the garage. We have an unheated garage and the back window looks out on an expanse of snow covering the lawn. My woodshed casts a blue shadow for the first hour or so of morning after sunrise. In addition there is a band of dark spruce trees behind the lawn so I have a choice of backgrounds ranging from pale blue to dark. Sure enough the frost feathers had formed. I remember Dennis Fast lamenting that he has lost the opportunity to photograph the buildup of window-frost that occurs on cold mornings now that he has a newly renovated sunroom with more modern air-tight windows.

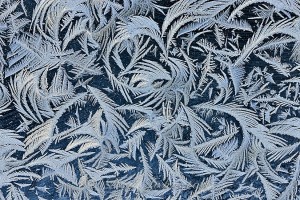
Garage window frost feathers. Blue shadowed snow background.

Garage window frost feathers. Blue shadowed snow background.

Garage window frost feathers. Spruce woodland background.

Garage window frost feathers. Spruce woodland background.

Achieving sharp macro photos is one of the biggest technical challenges for this project. I have to improvise a support for the camera and lens in the optimum position for these photos. I need to support the camera during exposures on a rather unstable wooden workbench. I found that a beanbag on a milk crate, shimmed if necessary to prevent wobble, works better than trying to set the legs of my tripod on the workbench. The micro lens has very limited depth of field, even at f22, so to achieve sharpness everywhere in the frame I need to position the camera and lens so that its sensor is absolutely parallel to the window frost. I use extra boards under the milk crate to add or subtract height depending on where I need to frame the frost, choosing the nicest swirls against a blue or dark background. The backgrounds are so distant that at f22 they remains soft.

Garage window frost feathers. Sometimes a 2-3 frame focus stack is needed if sharpness varies from top to bottom.

Garage window frost feathers. Sometimes a 2-3 frame focus stack is needed if sharpness varies from top to bottom.

For my frost photography I use a 200mm micro Nikkor with or without a close-up diopter (for extra magnification) that can be attached in front of the lens. The D800 produces such large files that any one can be judiciously cropped if necessary and still produce a Tif of adequate size. I always shoot RAW with a manual exposure of about 0 to +1 depending on the background. I prefer manual White Balance that I can adjust afterwards too. I use my hand to dampen the camera into the bean bag. I use Mirror lockup and a cable release to further ensure sharp results. After each exposure I check the histogram and zoom to 100% on review to assess sharpness (there is a menu setting that activates a button for this action).

Working inside the garage keeps me out of the wind but it is still very cold so I need to dress warmly and use gloves to handle the camera. I like the Freehands photography gloves with flip-back fingertips (held back with neat magnetic buttons). Once I finish I wrap the camera in a big plastic bag and let it warm up inside the house. In a few hours the beautiful frost feathers will sublimate off the window.

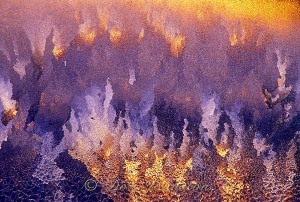
Interior window frost with rising sun @ -40

Interior window frost with rising sun @ -40C

Interior window frost with rising sun @ -40

Interior window frost with rising sun @ -40C